A photographer's job would be so much easier if the files were perfect and ready for print straight out of the camera. Well, just like in the film days, there is quite a bit of *digital* darkroom editing that needs to be done to each image afterward. Here is a great example... This "before" image is straight-out-of-camera. Because I needed a fast shutter speed to stop the action, the image ended up being a couple stops underexposed. Because I shoot in RAW format, I knew I could up the exposure some in post-processing. A quick note on this - I don't rely on "oh, I'll just fix that in Photoshop". In fact, I'd rather not. However, sometimes you don't have a choice. I had to trade off a perfect exposure in order to have a crisp action image.
Along with increasing the exposure, I warmed up the color temperature, removed some distracting elements, increased contrast and sharpened it overall.
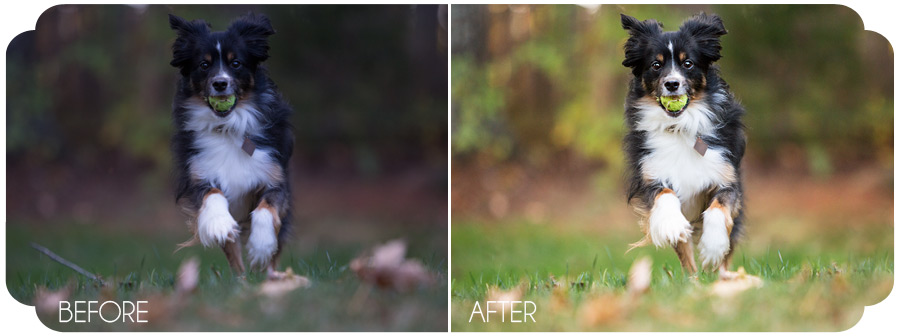
This is a perfect example of how a photographer's work continues way after the camera clicks. Edits like this occur with every final image. Often times, leashes have to be removed, eye goobers need to be cleaned up, shaved fur and/or tumors are asked to be covered, etc.
I love seeing this transformation happen and I think it's important for clients to see all of the hours of work that go into each image that is presented in the final gallery. I hope they enjoy it as much as I do!
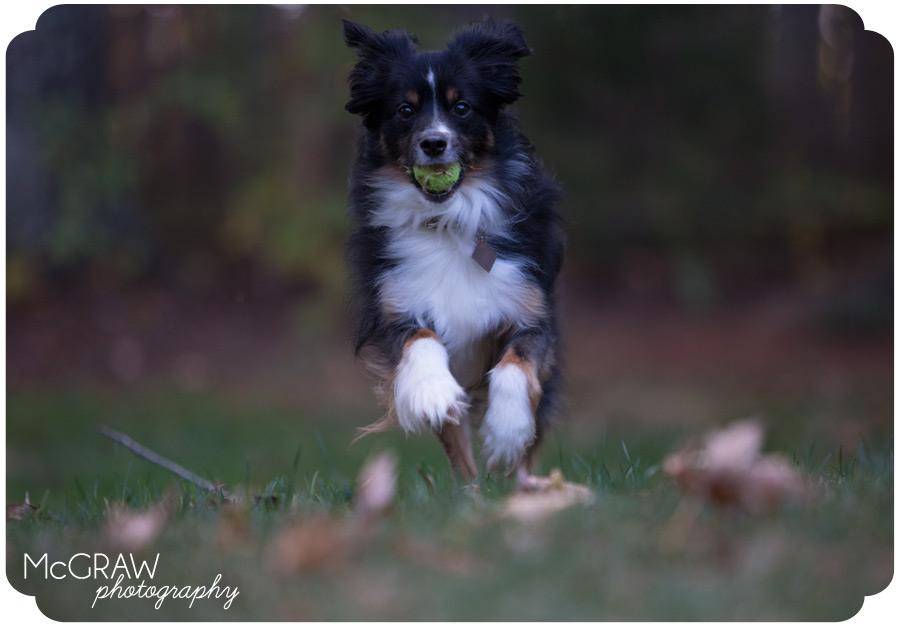
 This is the image after editing in Photoshop Camera RAW. I warmed up the color temperature, adjusted the exposure and increased contrast. Much better but it still lacks the pop I'm looking for.
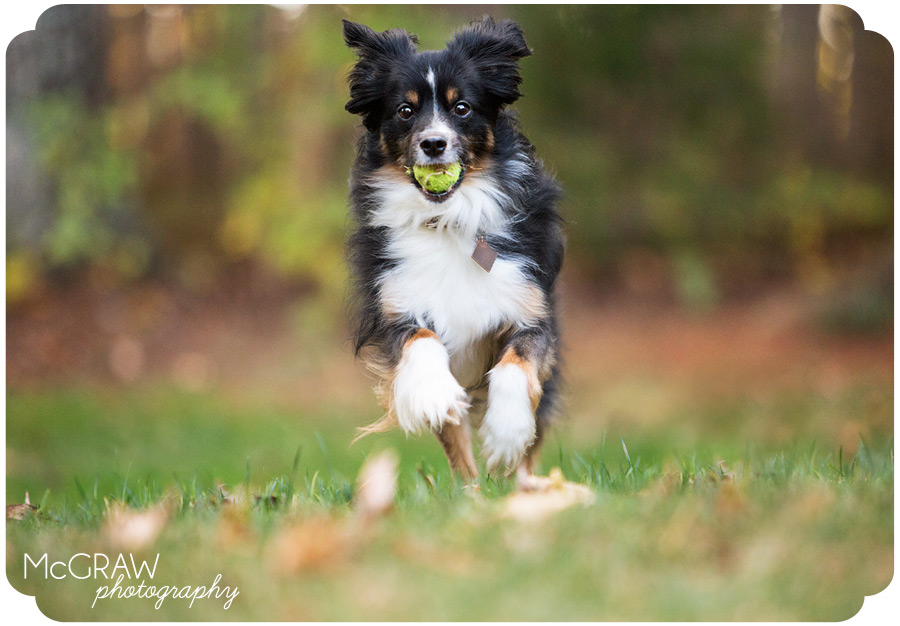
 Here is the final image after my tweaks in Photoshop. I made several curves adjustments both overall and locally, did some clone work, and adjusted the eyes to make them really shine. Lastly, I sharpened the image. This is the image I saw in my head when I took this shot...

